Tiling for Beginners
The job ain’t easy; it takes time, patience, attention to detail, and most importantly endurance. We took on our first tile job in our kitchen when we moved in to our home over six years ago. To this day, it’s still been the biggest tile job we’ve done. Halfway through we knew we were in over our heads, but we persevered. Once we crossed the finish line, we were confident we could do the job again. Like any other project, we prepared by researching all the materials that we needed for the job.
Materials
Prepare
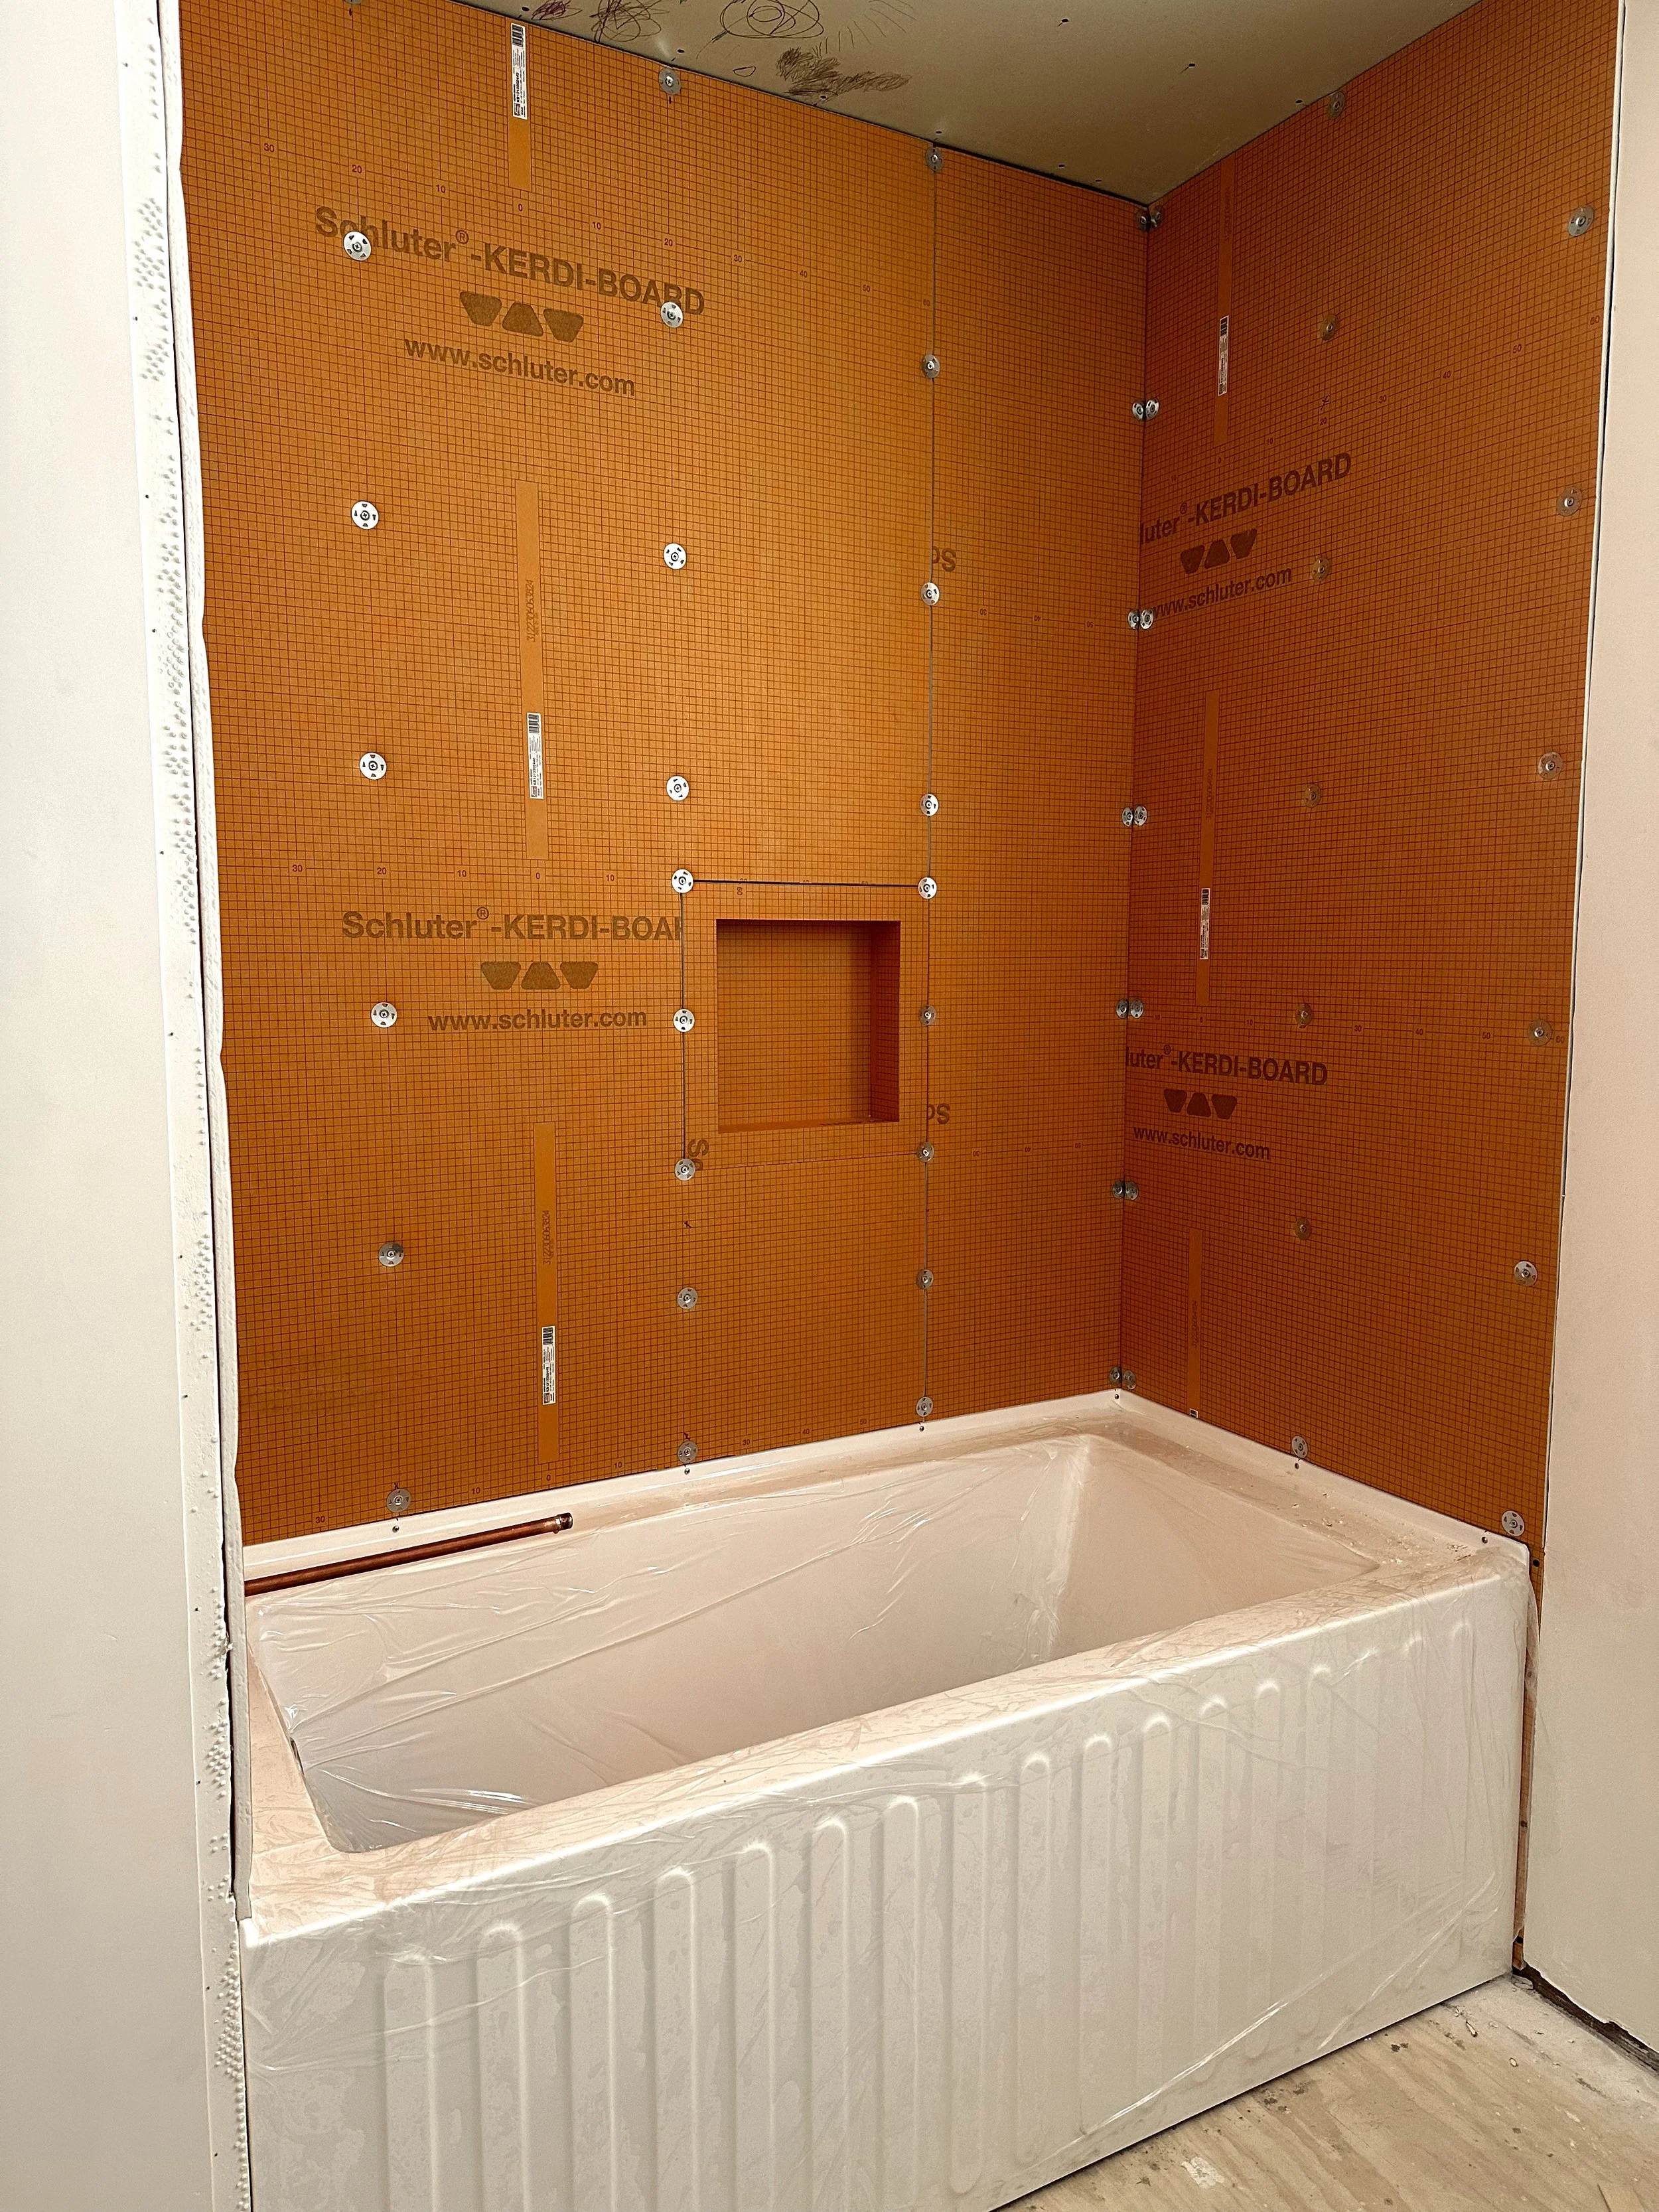
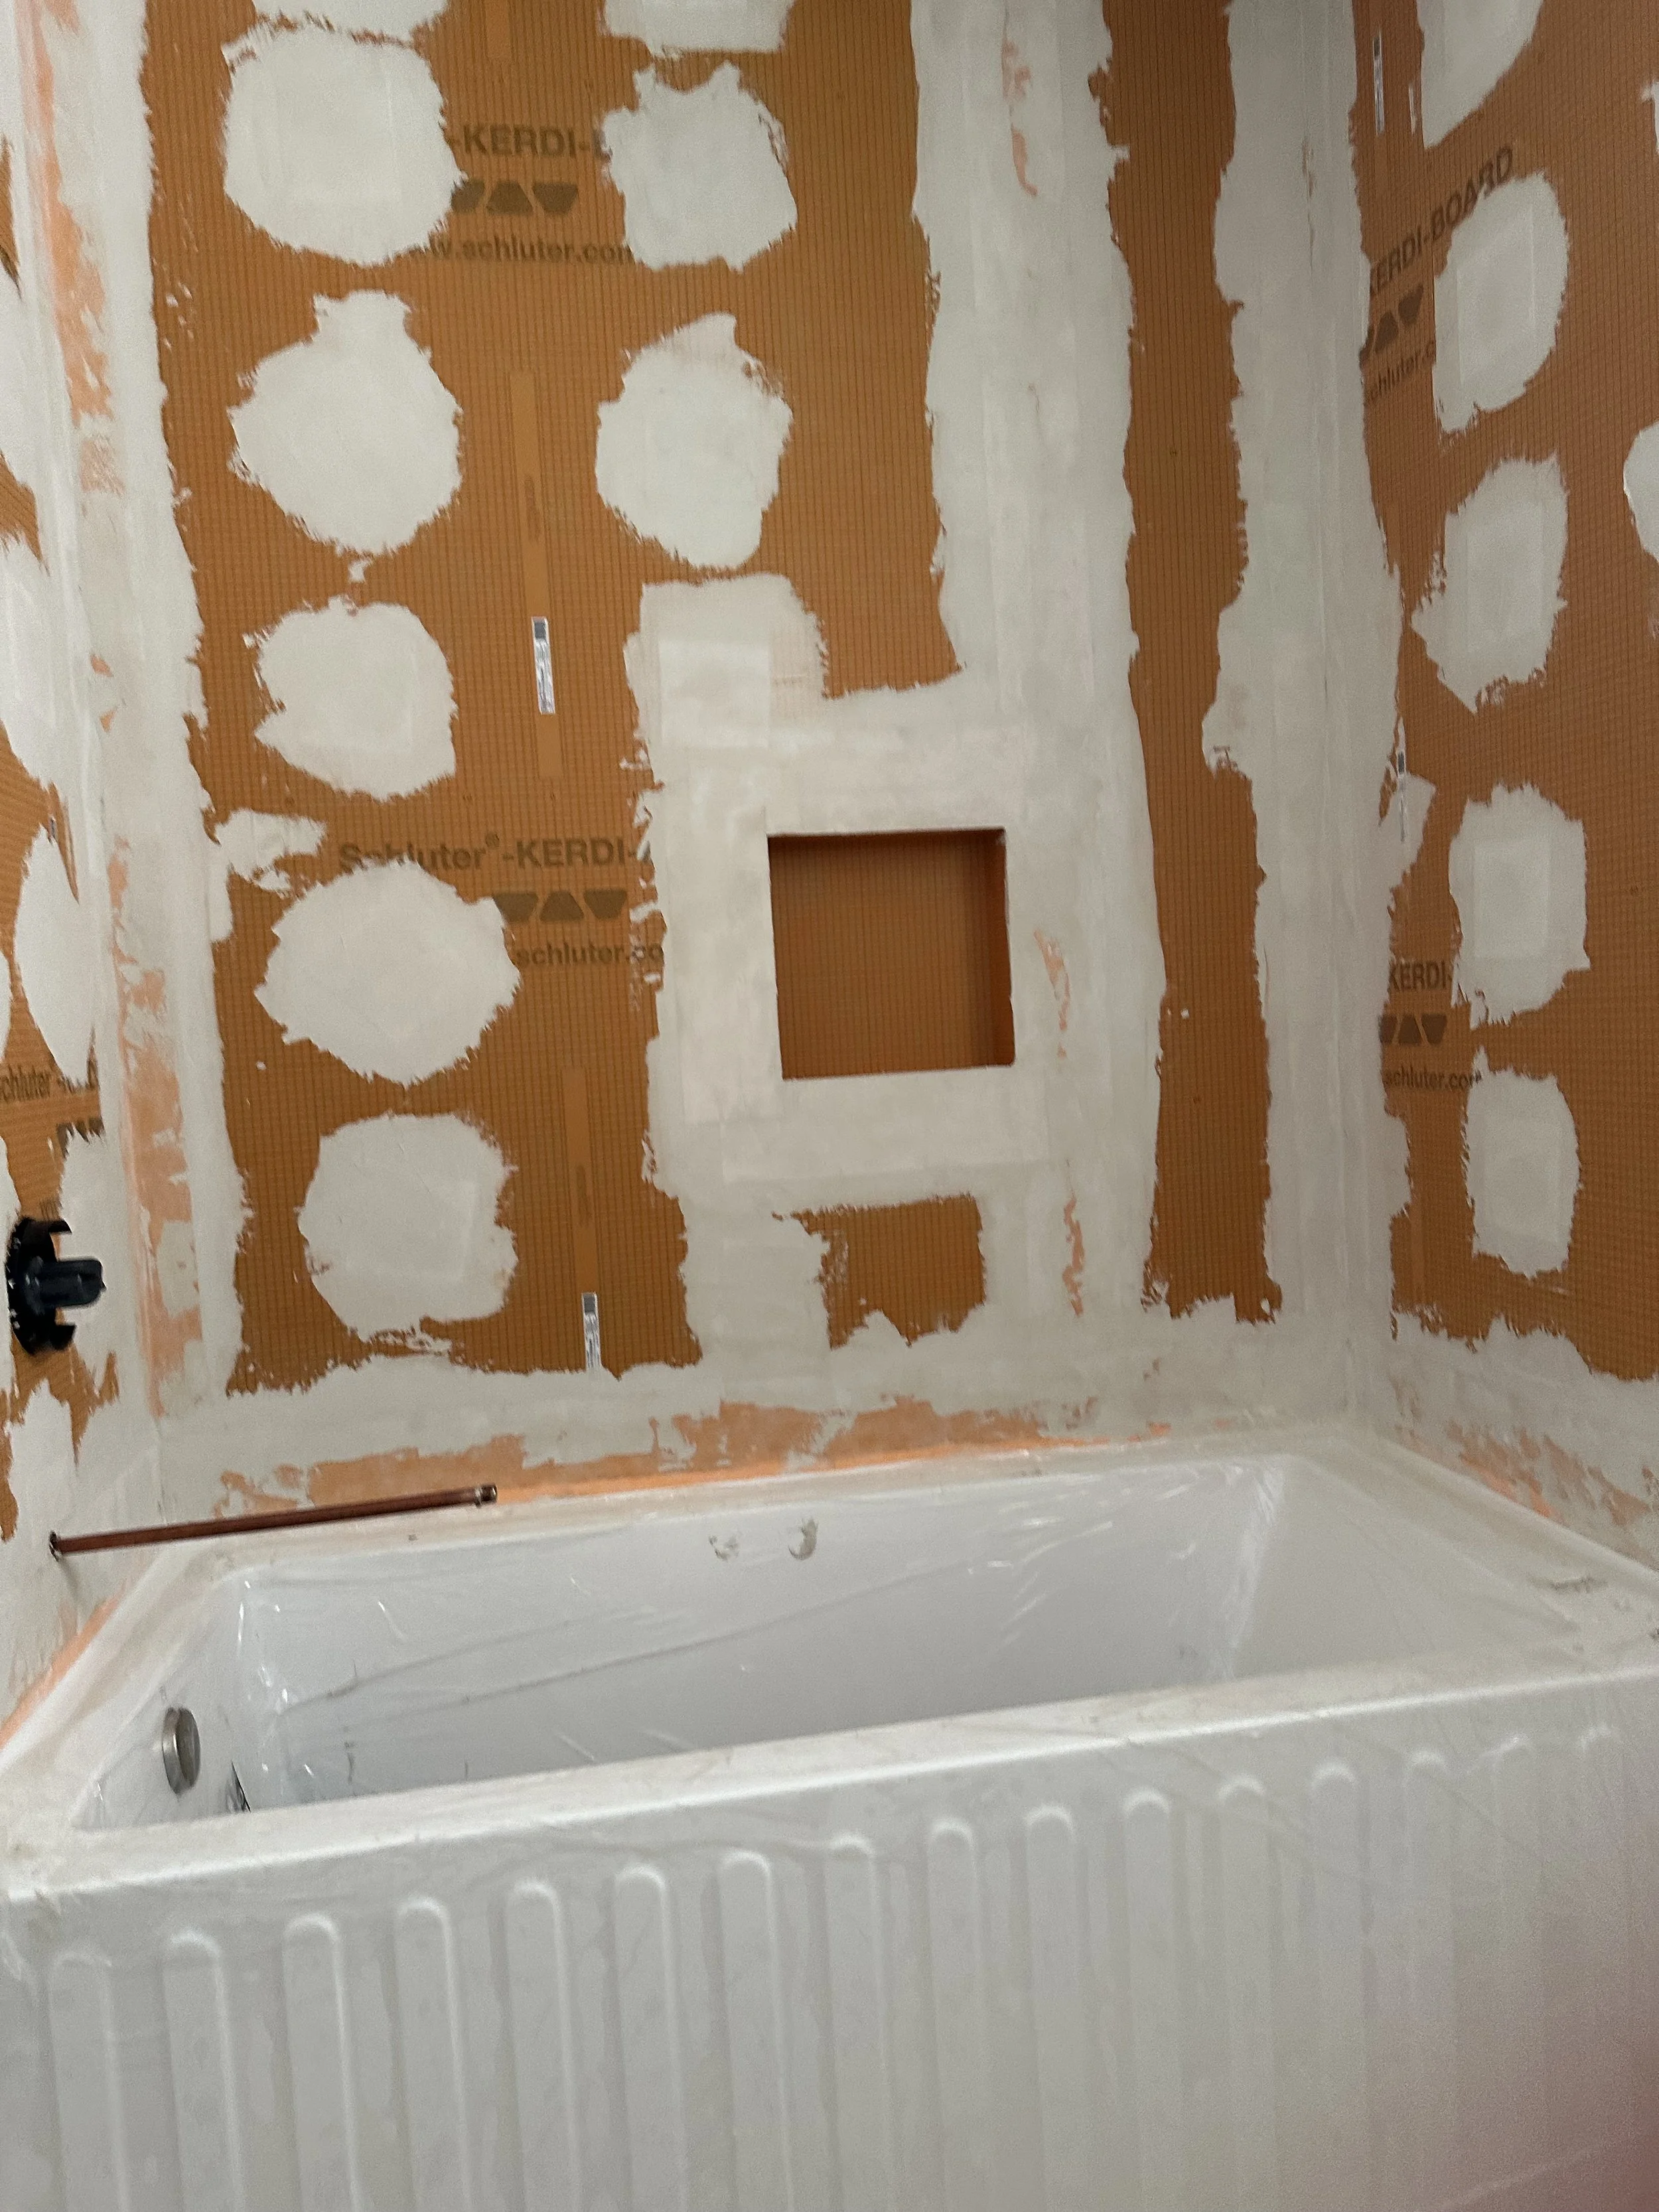
The step everyone dreads but is the most important part to the process. If you don’t perform during this step, then things could go south real quick. It’s my least favorite because it always looks worse during prep. First thing’s first, ensure the surface you are working with is level. Whether it’s a wall or the floor that you’re tiling, it HAS to be level or it can cause issues in the future. Once your surface is ready to go, you can start installing the prep materials. We found that the Schluter Kerdi products made this part easy and straightforward. For the walls, we used these waterproof boards. All you do is cut to size with a utility blade and connect pieces with these washers at the seams. The seams and the holes from the washers could lead to potential water damage, therefore Schluter recommends you use their waterproof band along with this thinset to seal everything. Now you are ready to install!
Install
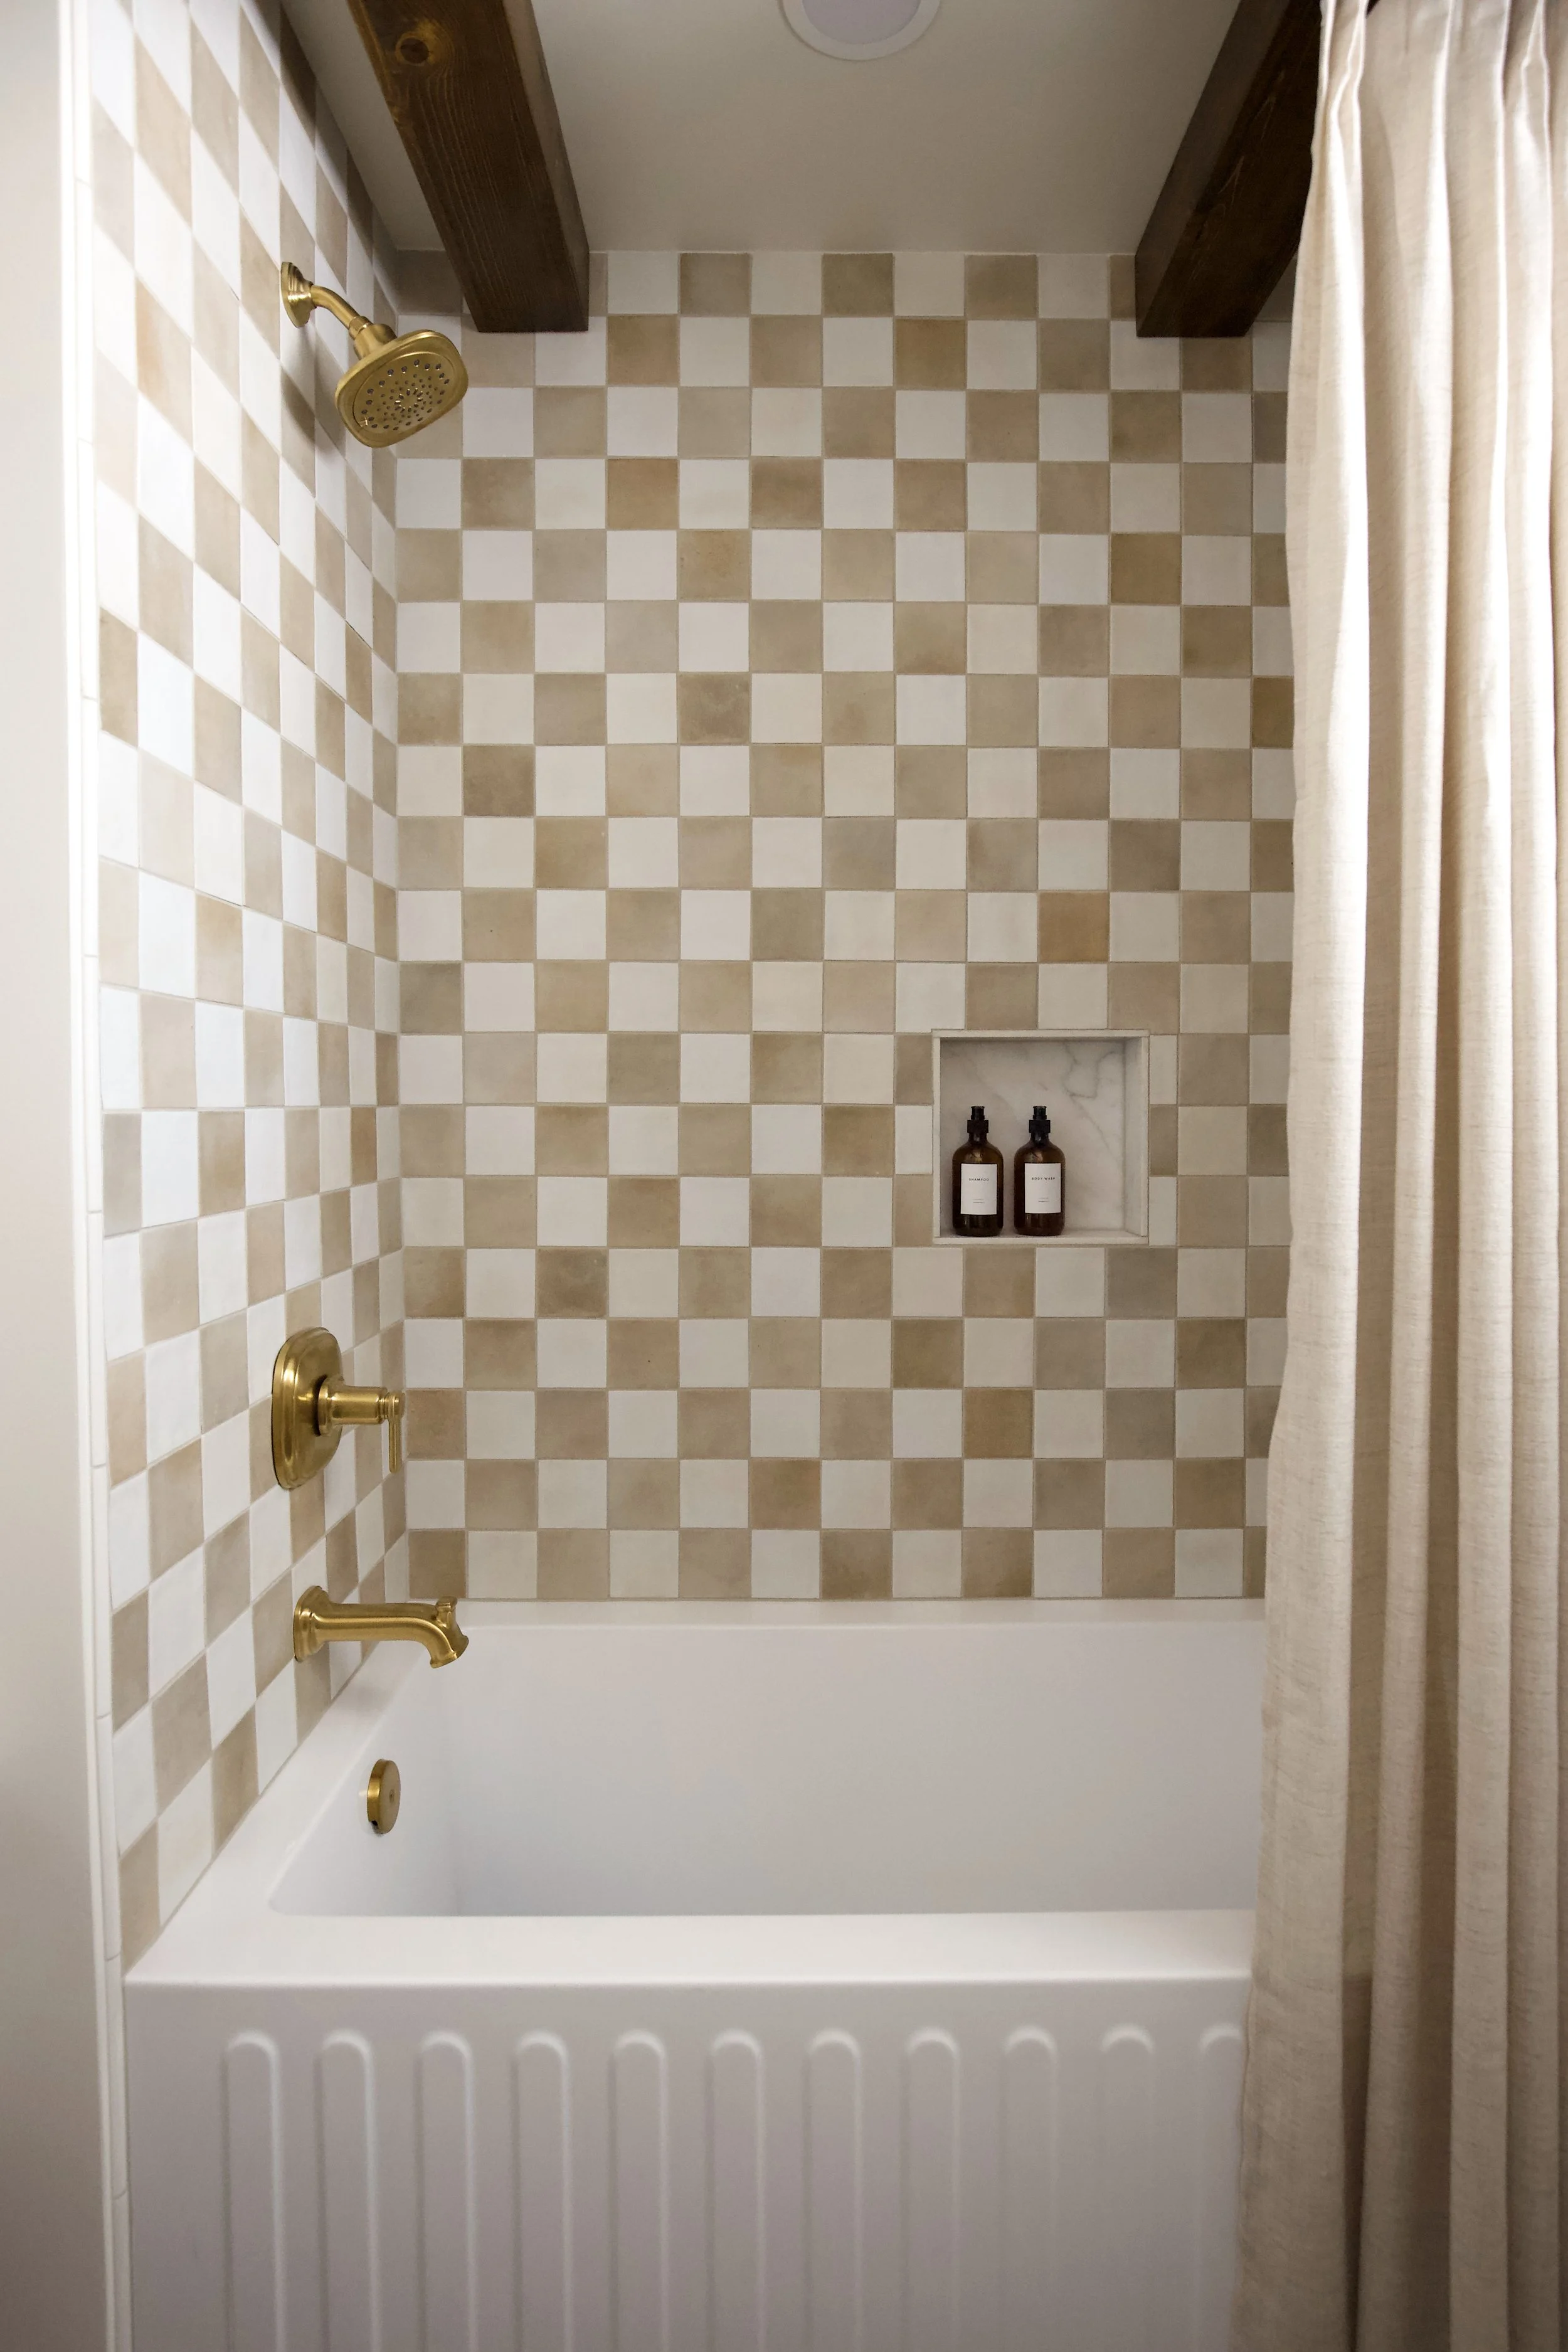
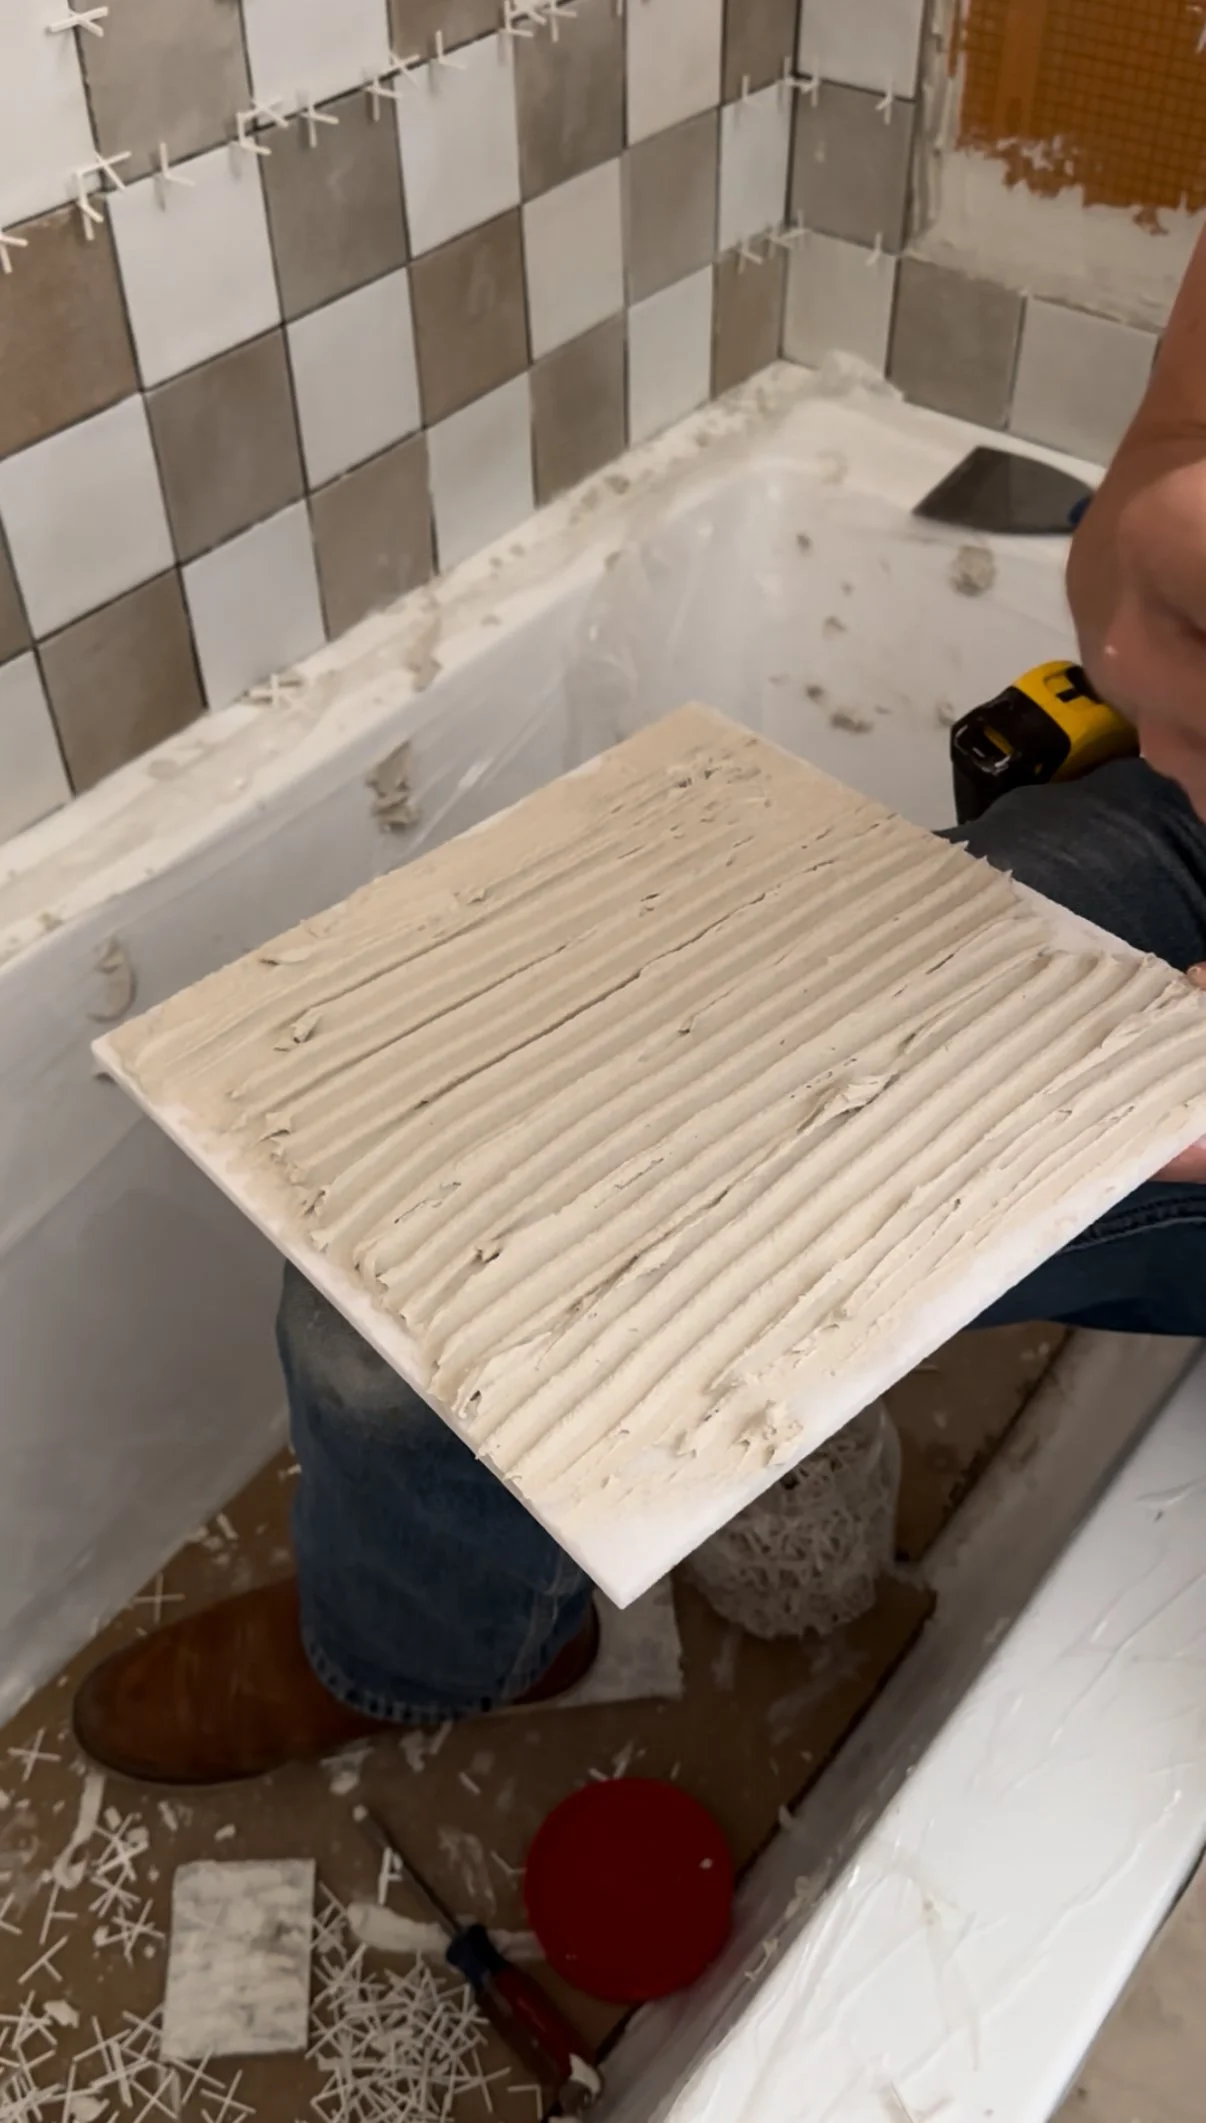
I love and hate this part- if that’s even possible. I’ve spent so many long, late nights tiling which has given me a little PTSD. However, it’s the part where you start to watch your design come to life. Call it art. My recommendation is to dry fit all your tiles so you know exactly where you’d like to start. Then you can envision what the cut tiles on the ends will look like moving forward. Once you’re ready to lay, mix your thinset and get to laying! The first row always takes the longest. After the first four or five rows, you then start to get the hang of it and become more efficient. When installing with thinset, spread the mixture on the wall with your trowel as well as on your tile. This is called back buttering. It creates better adhesion and gives you peace of mind. You’ll have an hour or so to wiggle the tiles around before it starts to set. While you’re installing each tile, be sure to use spacers. We typically gravitate to a thin grout line and use these spacers.

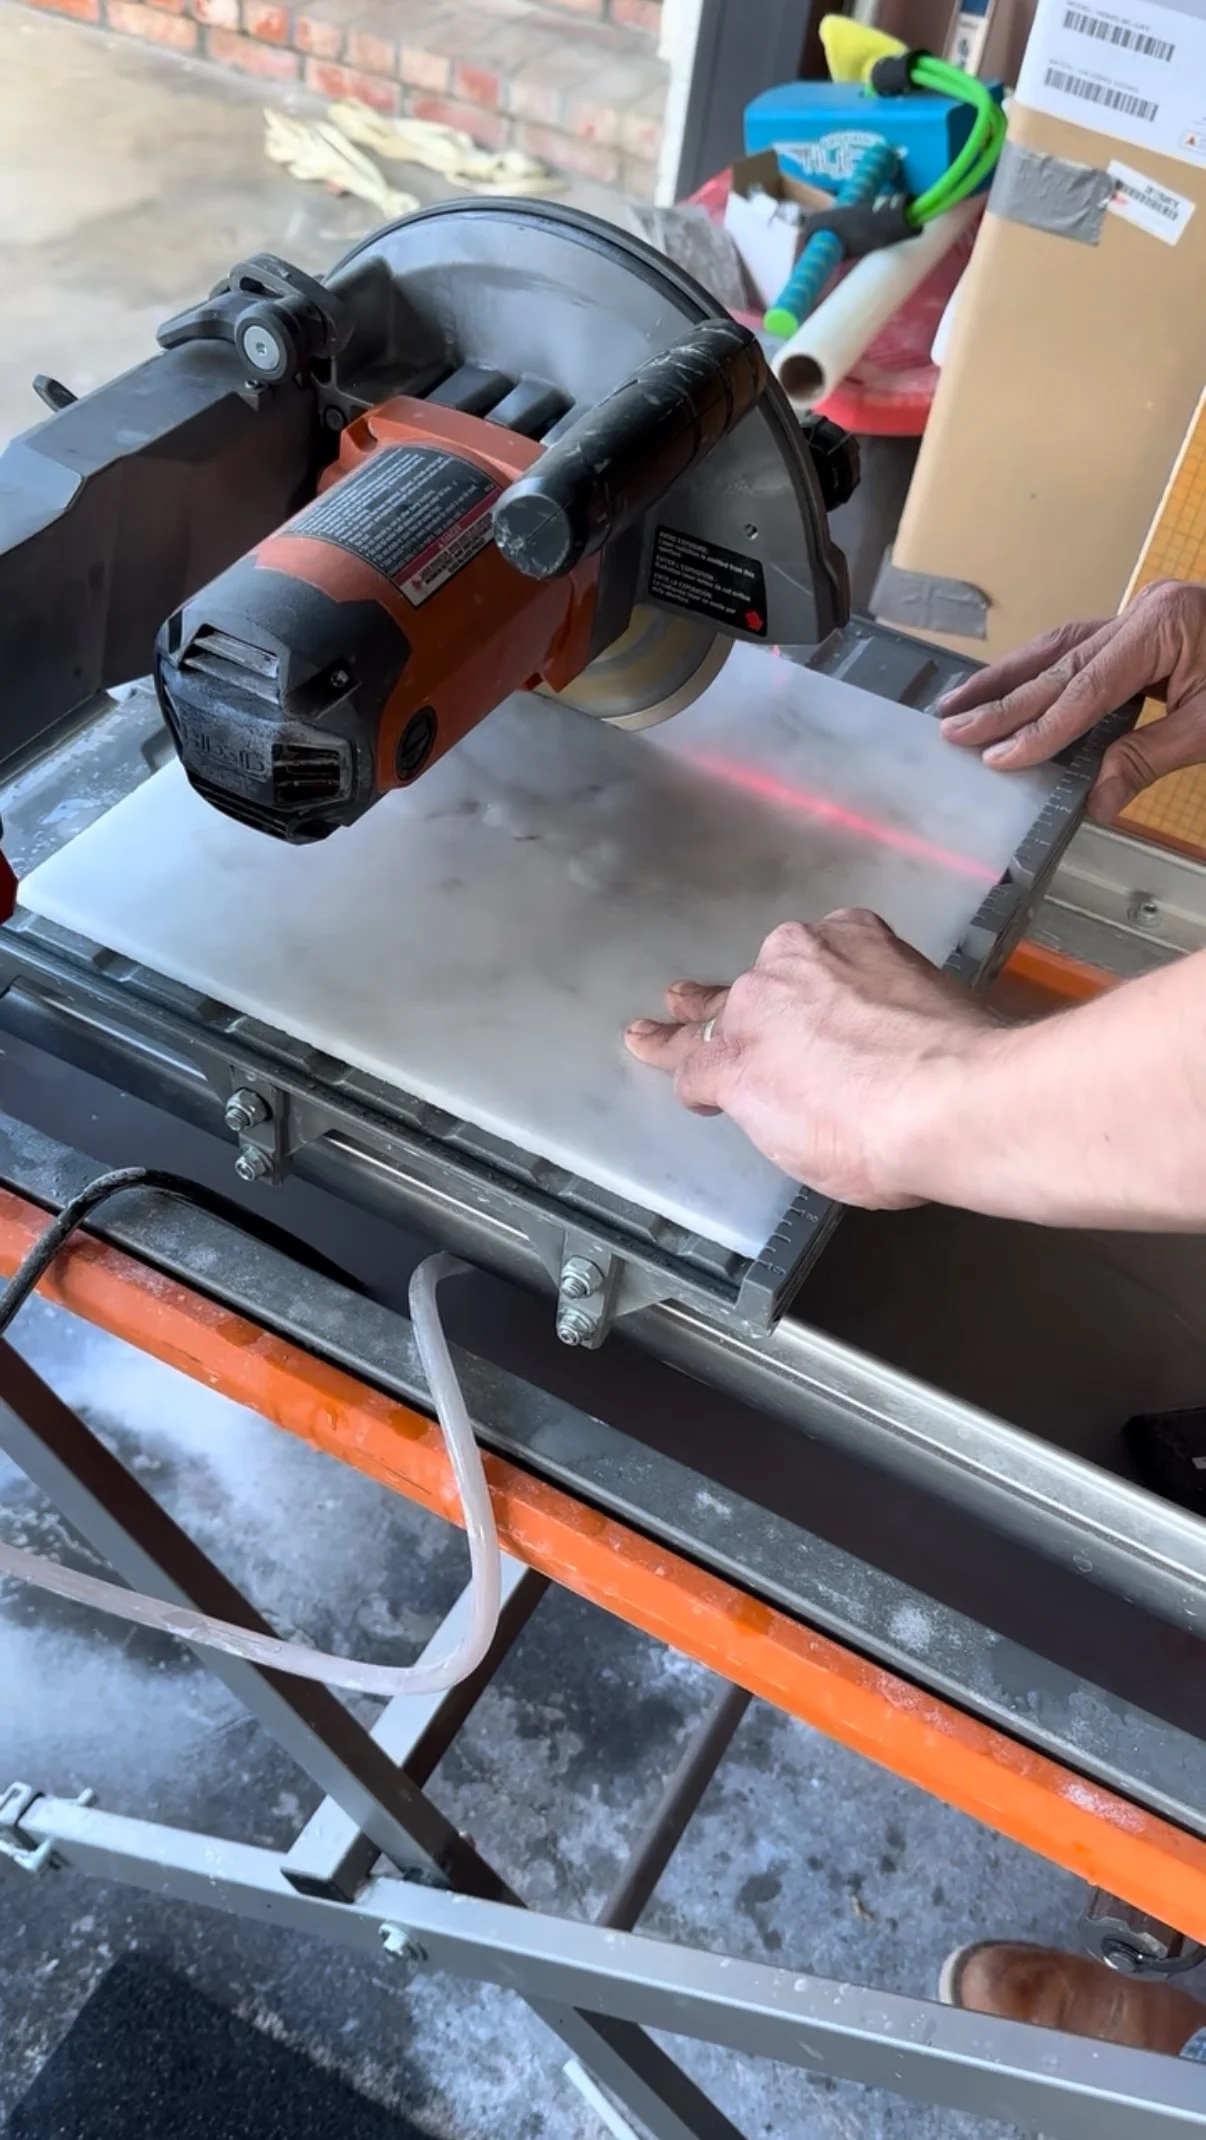
This tile saw from Rigid was easy to work with and met all of our needs for the DIY tile jobs.

Grout
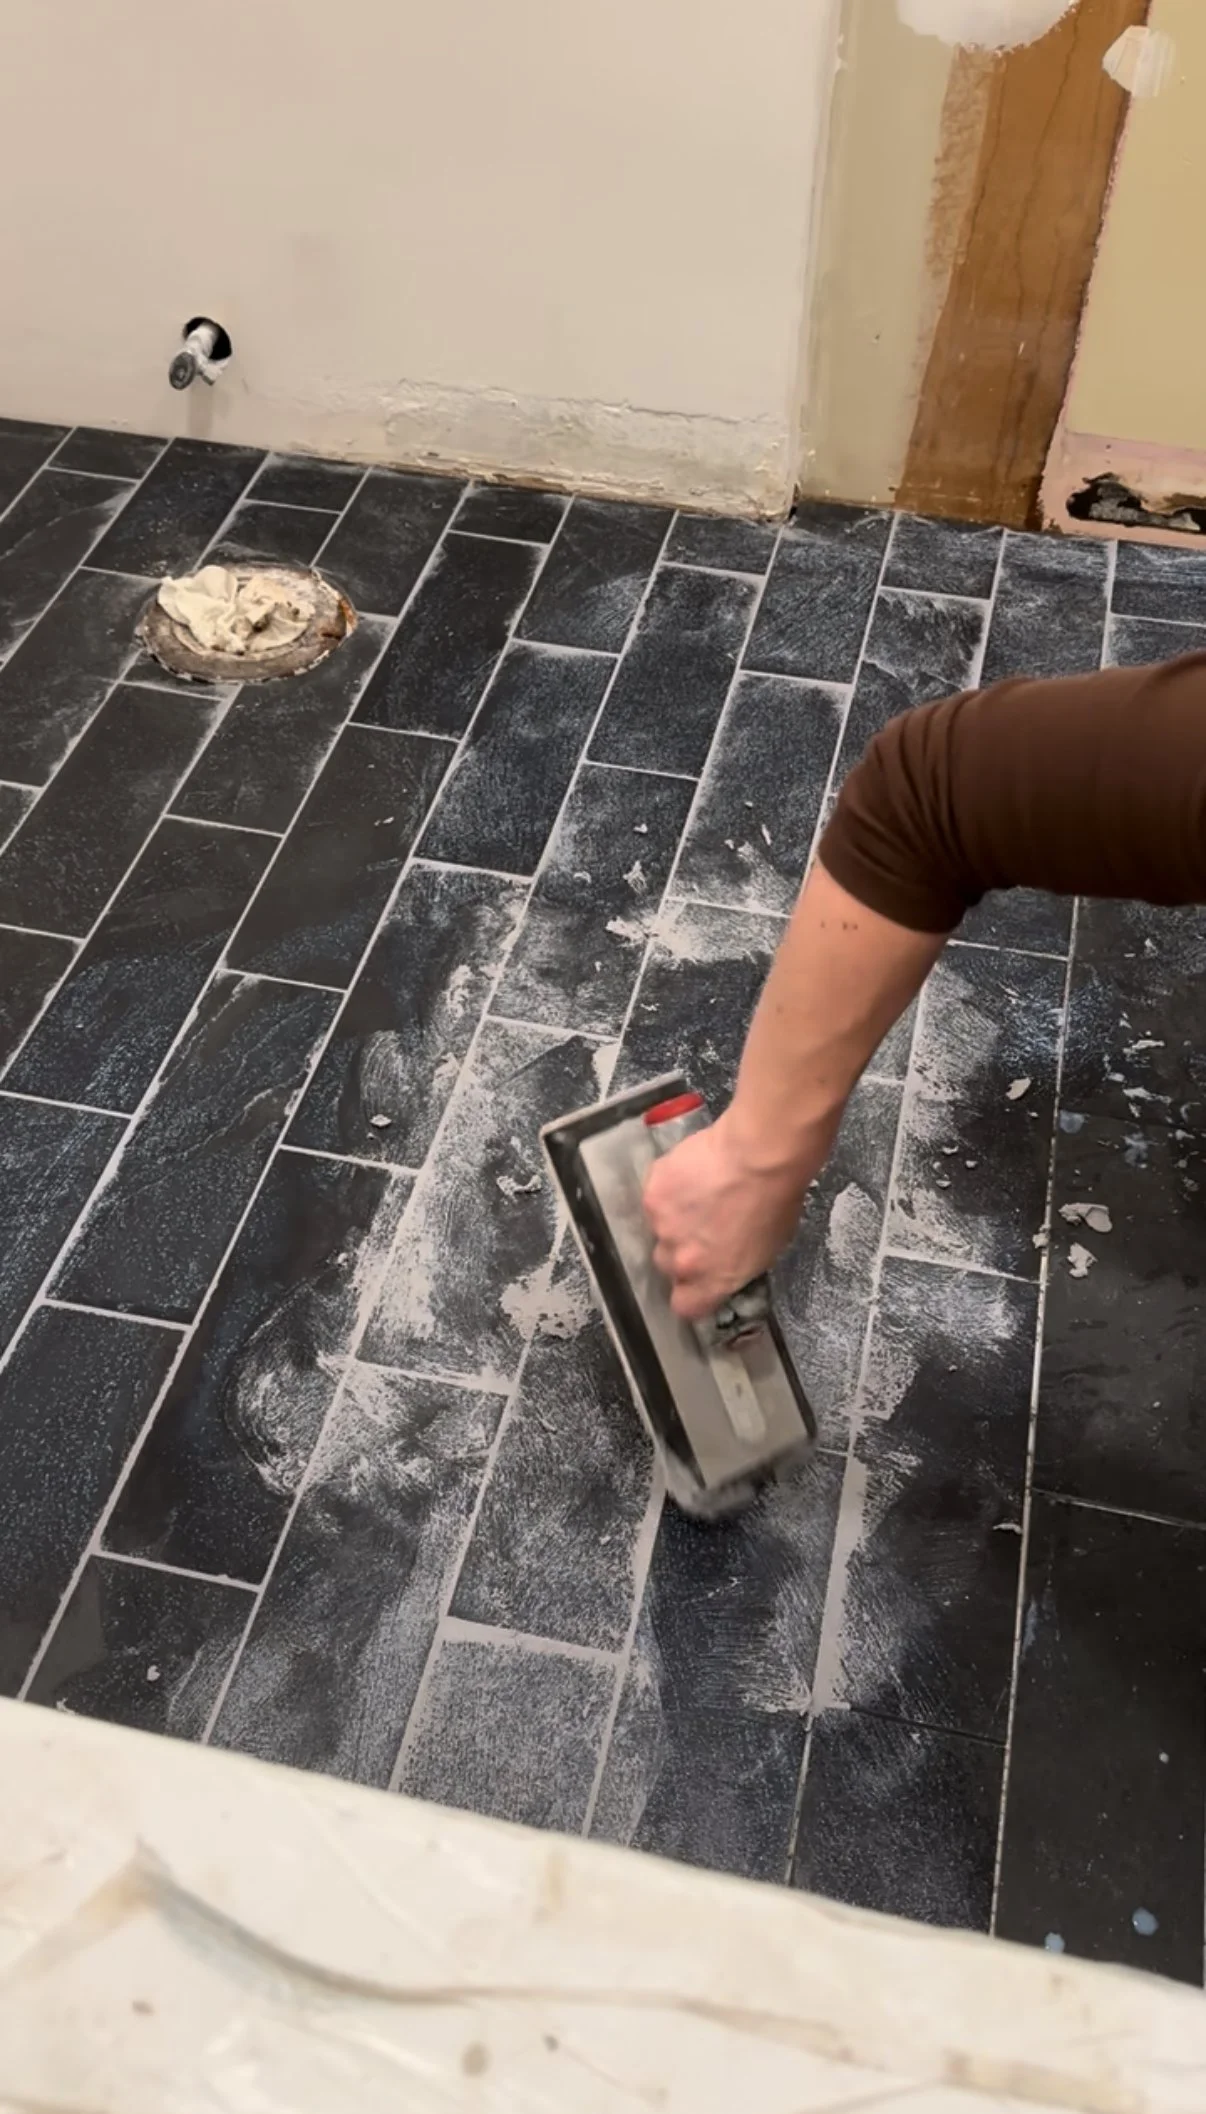
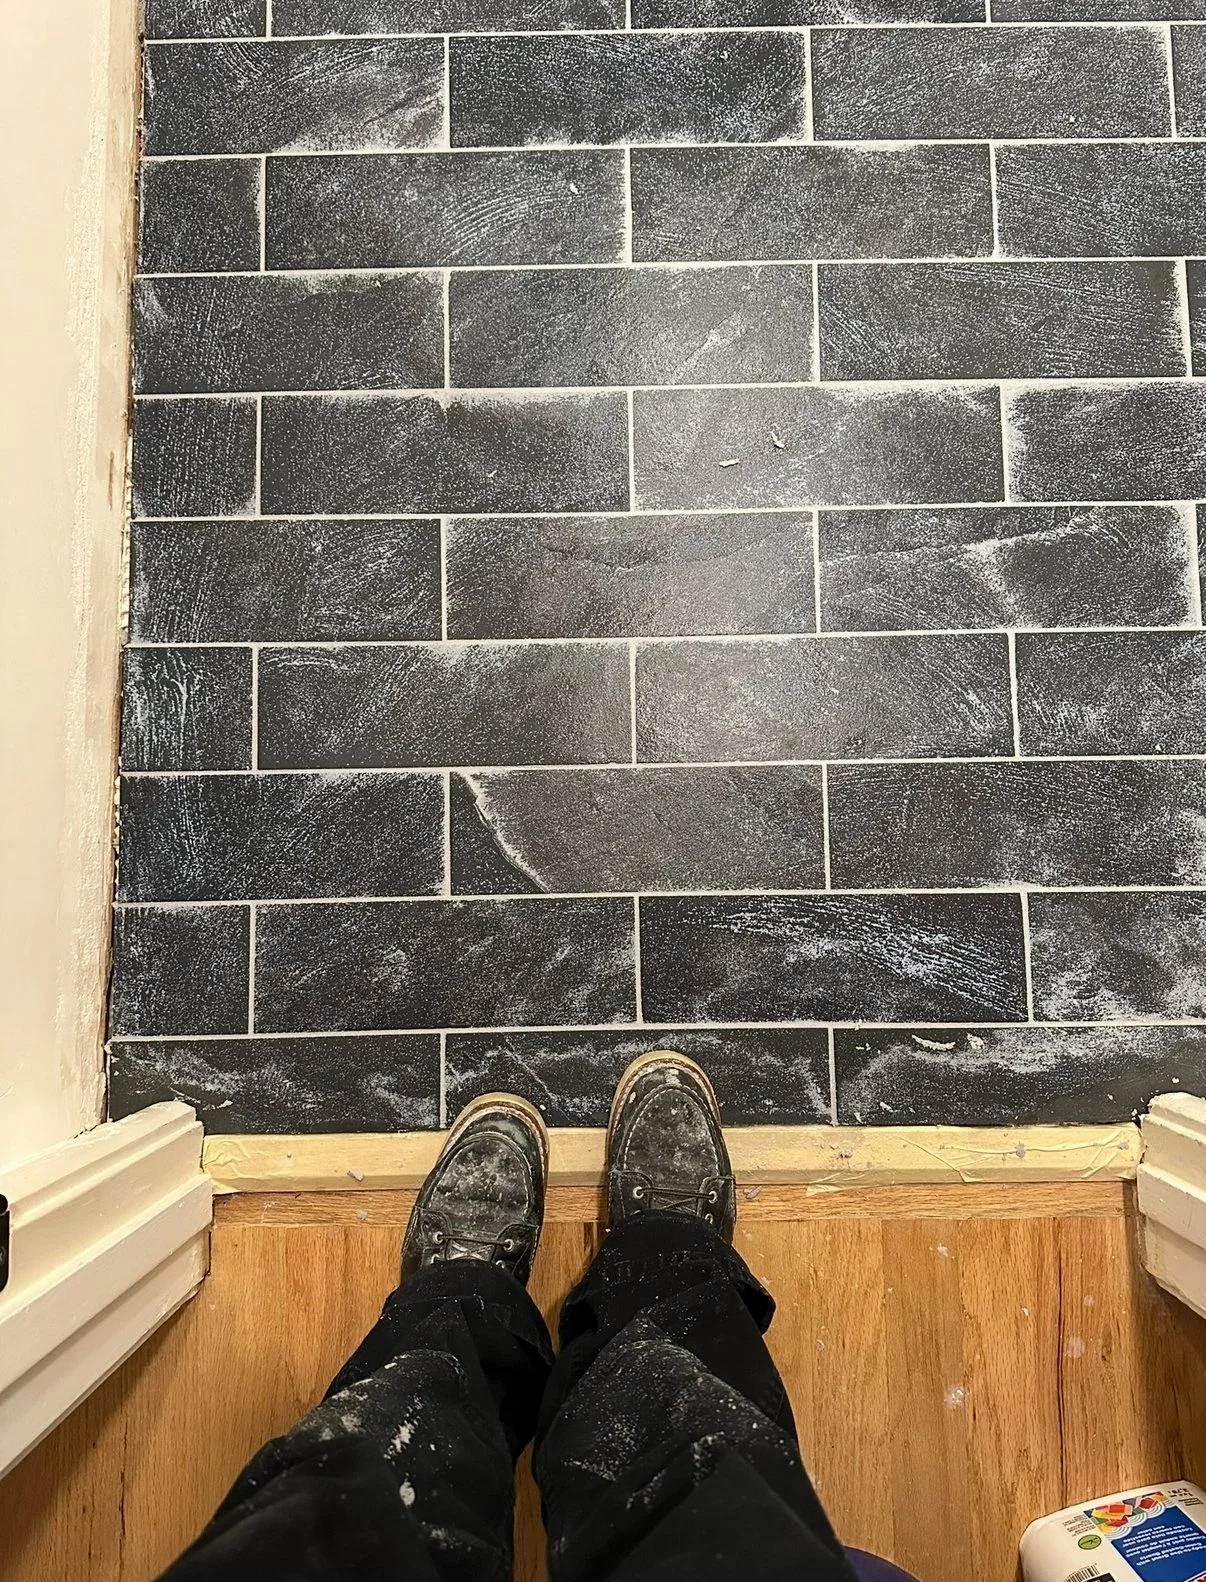
The step that finishes it all! You’re finally seeing the light at the end of the tunnel. We love using Mapei’s all-in-one grout. It has a sealer mixed in so you don’t have to worry about the additional step. We also prefer the pre-mixed grout and don’t have to worry about the color being inconsistent. Ensure all the joints between the tiles are clear of thinset. This way you’ll be completely ready to grout! Take your float and grab a generous amount of grout. Smear it in between the tiles and work on pushing the grout deep in the crevices. Wipe with a wet rag. The grout will take 24-48 hours to completely dry. You’ll notice a hazy layer on the tile. Now it’s time to de-haze. We typically like using a scrub sponge- it’s abrasive enough to remove the layer without damaging the tiles.
And there you have it! All your hard work is done. It’s a tedious but completely satisfying line of work if you ask me. We have now tackled three major tile jobs in our home. I guess you could call us professionals. Don’t be intimidated about the process, parts of it can be forgiving. Now put that hard hat on and get to work!

Follow @meetthemosers on Instagram for more inspiration!